iDRAC9 configure SNMPv3
24 Jun 2023
In this short article I will demonstrate how to configure SNMPv3 for a DELL iDRAC 9 IPMI. I also add show how to quickly add a device to LibreNMS.
The tasks can be broken into three sections:
- Enable the SNMP service2023
- Create a local user
- Configure SNMP traps - optional
- Add to your NMS
- Bonus - RACADM
Lets start!
Enable the SNMP service
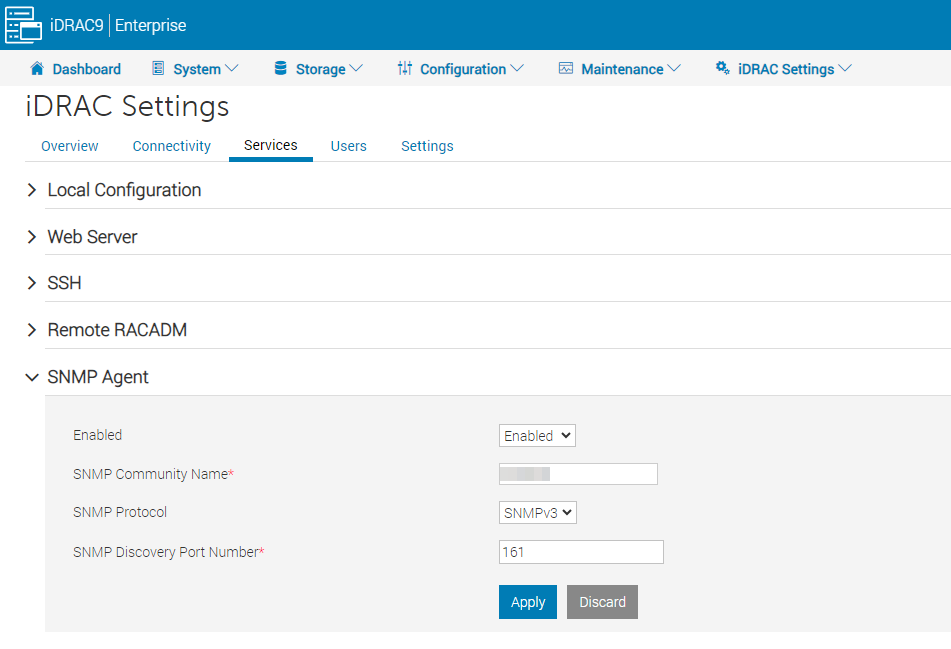
Navigate to iDRAC settings on the top bar, then within its sub menu select ‘Services’.
Expand the SNMP Agent tab and set a community name, change the SNMP protocol to use version 3 then apply the changes.
Create a local user
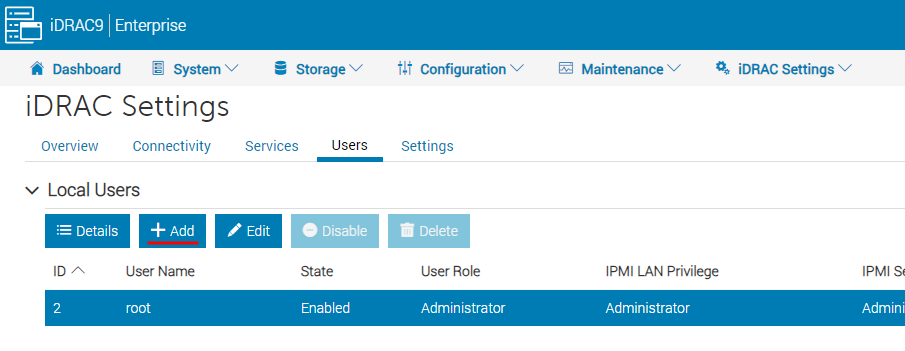
Navigate to iDRAC settings and select ‘Users’ from the drop down menu.
Expand the Local Users tab and create a new user by clicking the ‘’+ Add’ button.
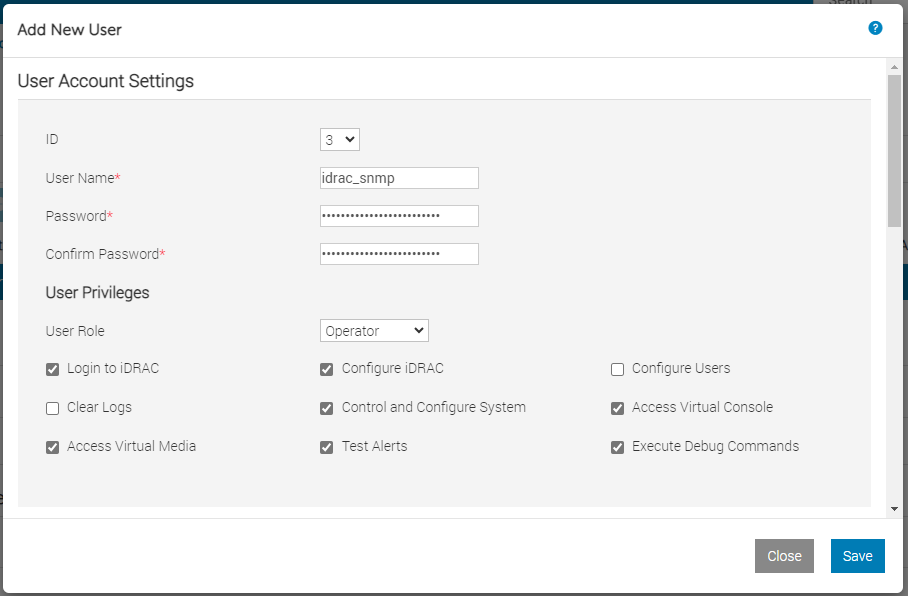
Type in your preferred user name and password, I have used a simple naming convention with a strong password.
From the user privileges section change the user role to Operator. Strictly speaking we only need to user to be able to login.
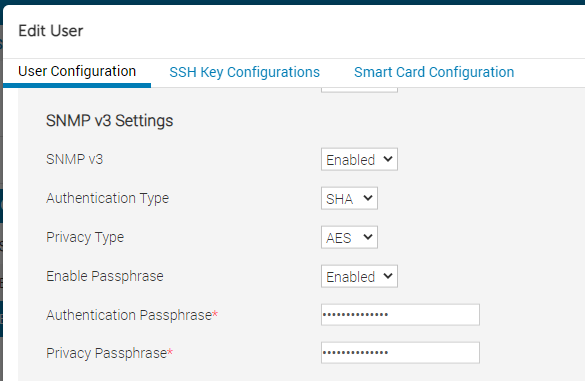
Now scroll down to SNMP v3 Settings.
Change SNMP v3 to enabled.
The default types of SHA and AES are good, its not recommended to use MD5 or DES as they are more secure.
Enable Passphrase, which will make the Authentication and Privacy passphrase fields appear.
Set a strong Authentication and Privacy passphrase (Do not exceed 32 characters), then save and close.
Configure SNMP traps
Traps are when the device configured will send information when a trigger is met, whereas typically SNMP the NMS will query the device by polling it.
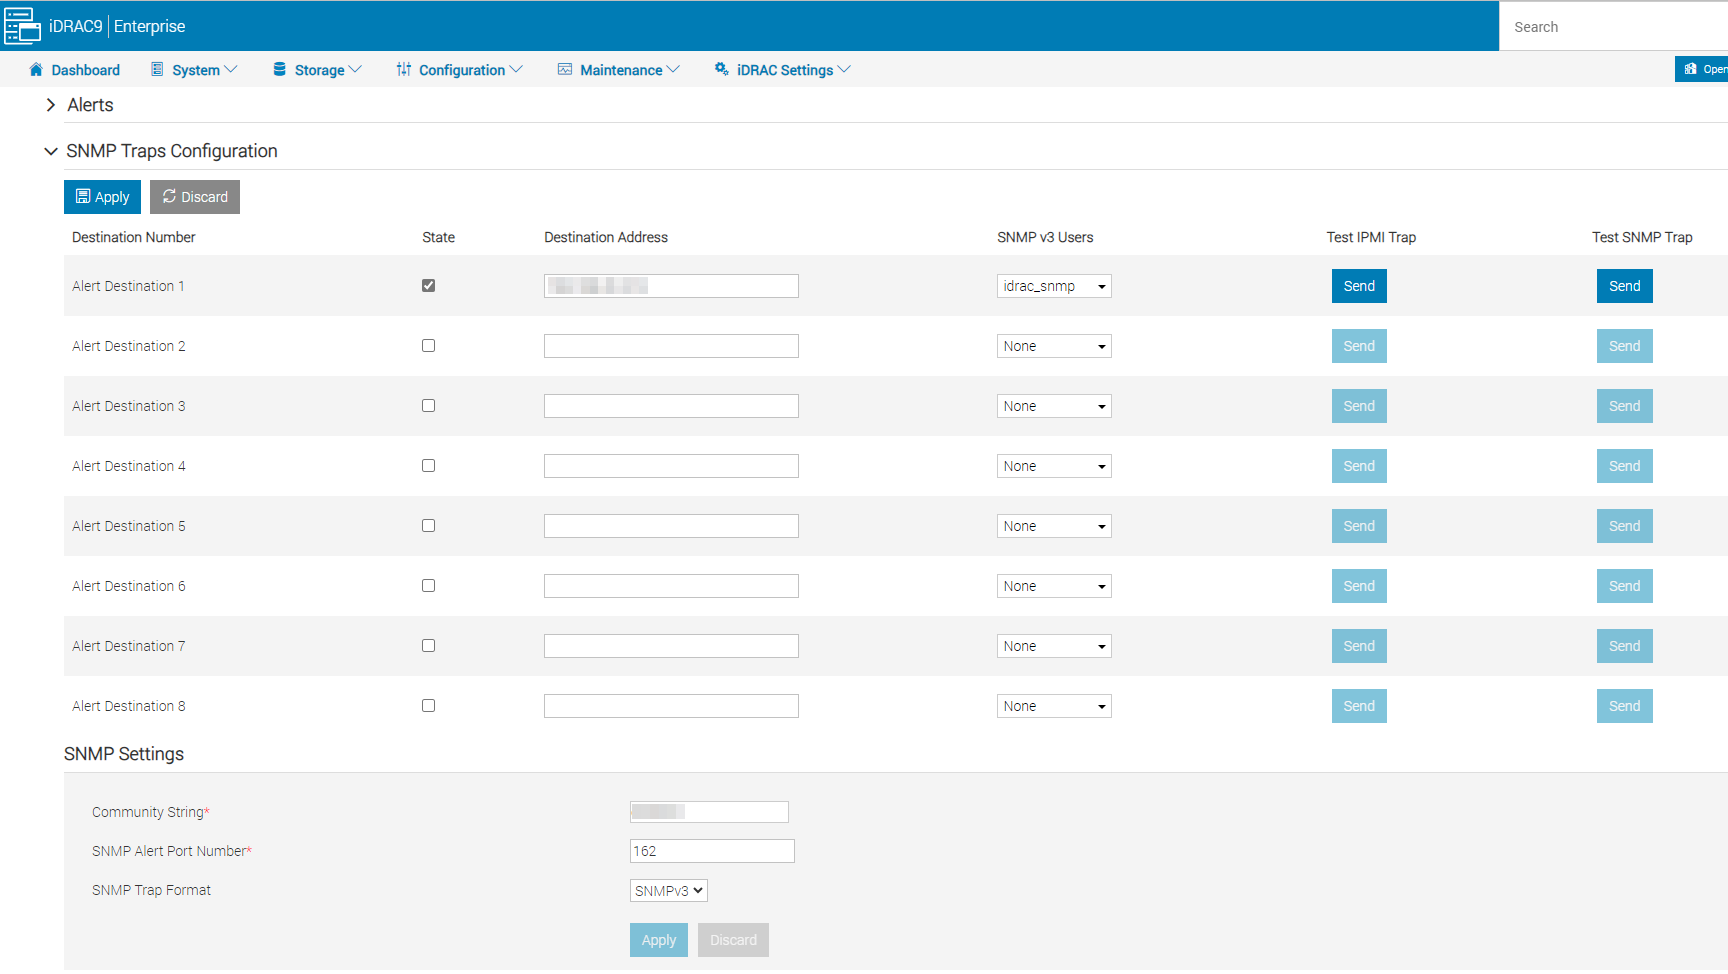
If you would like to configure SNMP traps, start by navigating to Configuration on the top menu and selecting System Settings.
Now expand Alert Configuration and SNMP Traps Configuration
From here you’ll need to set the SNMP settings at the bottom to include your Community String and set the SNMP Trap Format to SNMPv3
Lastly enter your NMS server address and from the dropdown select our SNMP user, which we created earlier.
Add to your NMS
Depending on your NMS, depends on how you’re adding devices or having them automatically discovered. I will demonstrate using LibreNMS a free, fully featured, open-source network monitoring system.
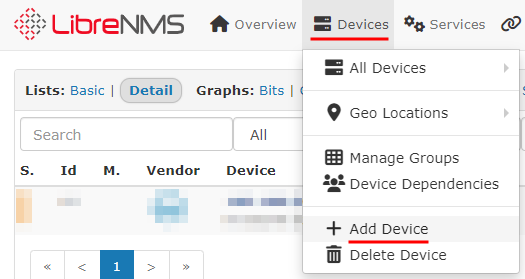
Start by navigating to Devices > Add Device
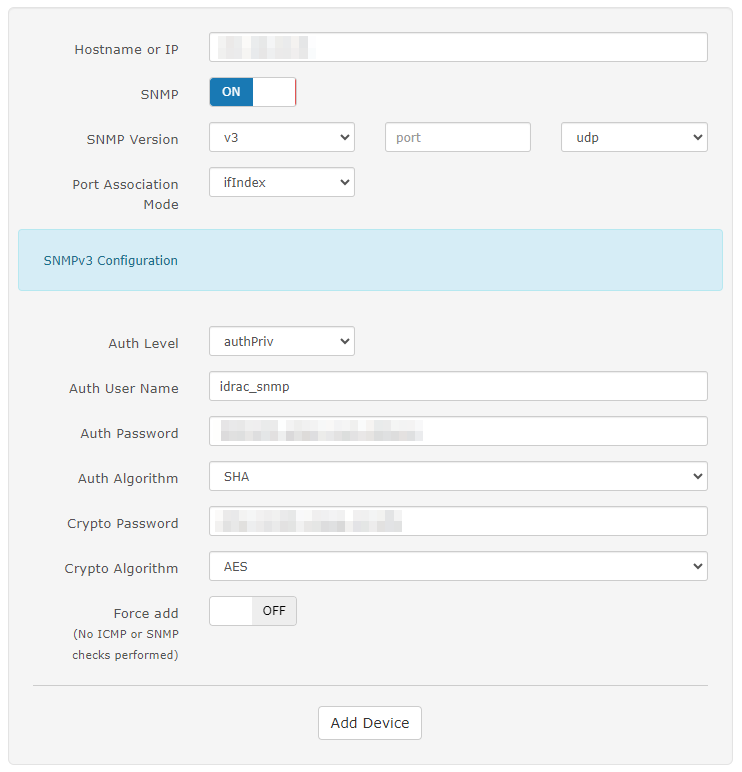
Enter a IP address or host name of the device, then change the SNMP version to v3.
Because we configured an authentication and privacy password within iDRAC we need to set the Auth level to “authPriv”, then enter our username and passphrases.
Click Add Device and the LibreNMS discovery workers with start communicate, and poll for metrics.
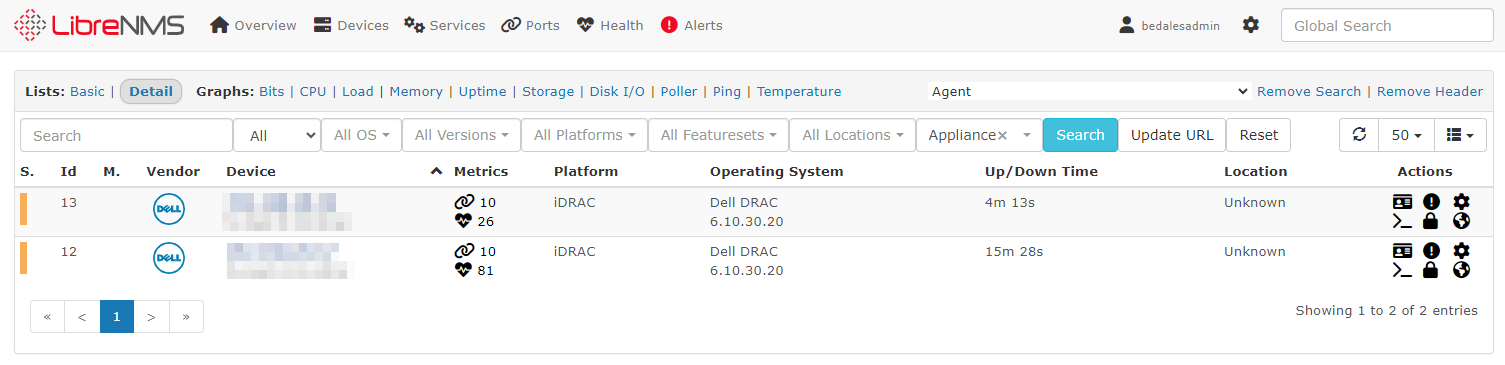
The screenshot below shows the newly added devices. LibreNMS does a fantastic job at configuring the device and including the appropriate MIBS.
Bonus - RACADM
There are some options that do not appear to be available in the web interface of iDRAC, therefore you may need to use the DELL RACADM tool.
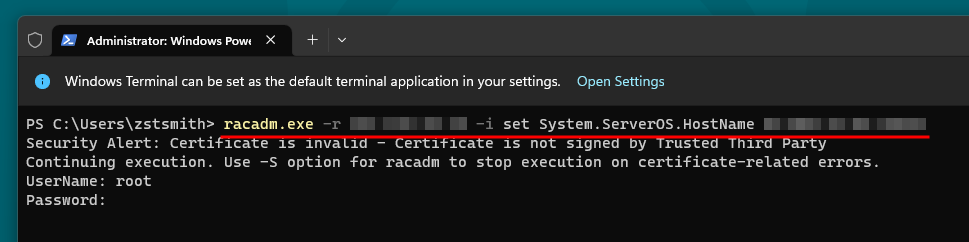
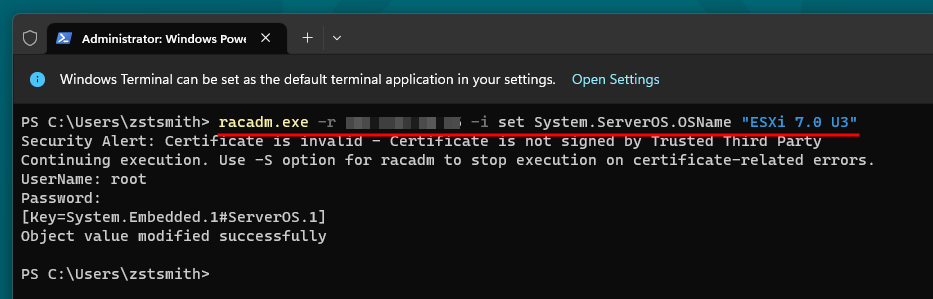
The examples below are to configure the server Host Name and Operating System (OS) Name.
More information can be found on the DELL website.
racadm.exe -r 192.168.1.10 -i set System.ServerOS.HostName MyServer
use of -i allows for an interactive prompt for the iDRAC username and password.
racadm.exe -r 192.168.1.10 -i set System.ServerOS.OSName "Operating System name"
IP Blocking
If you notice that your iDRAC servers are producing false positives, then you may need to check if the iDRAC is IP blocking.
To view and change this either use RACADM.exe or open a SSH connection to the iDRAC.
get iDRAC.IPBlocking
If you want to disable this feature then use the next command
set iDRAC.IPBlocking.BlockEnable Disabled
This setting can also be found within the iDRAC web interface, under iDRAC settings > Connectivity > Advanced Network Settings > IP Blocking