Rocky LXC and Podman
24 Jun 2023
In this article I will be deploying a Podman instance with Portainer for a management and web interface. Below is a list of the software used:
- Proxmox Virtual Environment is a hyper-converged infrastructure open-source software.
- Rocky Linux is a downstream Linux distribution, complete binary-compatible release using the Red Hat Enterprise Linux operating system source code.
- Podman is an open source tool for developing, managing, and running containers on your Linux systems. Originally developed by Red Hat engineers along with the open source community.
- Portainer is an open-source application container management platform with a friendly web interface.
I have already setup a Proxmox VE server therefore I will only cover the creation of a new LXC (LinuX Container).
Proxmox LXC
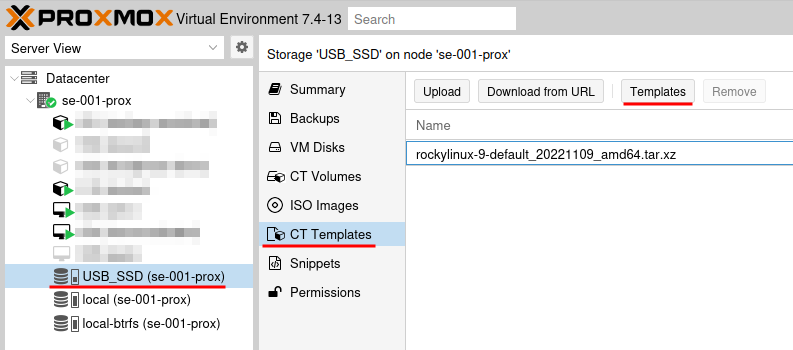
Download the Rocky Linux 9 image from CT templates in Proxmox.
Navigate to your storage, CT templates and click Templates.
Select and download Rocky Linux 9
Create a new container (CT)
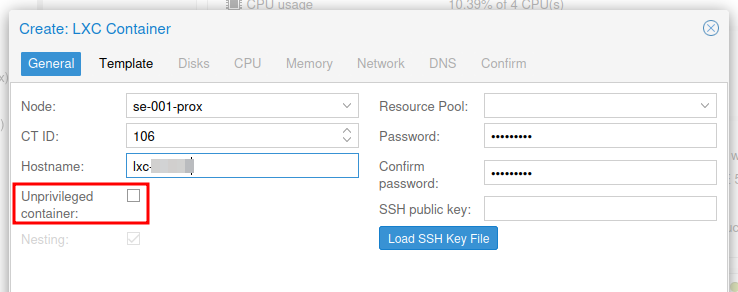
General Tab
Set a host name and password.
Also uncheck the ‘Unprivileged container’ box as we need this for NFS and CIFS capabilities.
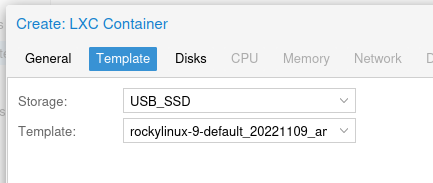
Template Tab
Select the downloaded Rocky Linux 9 image.
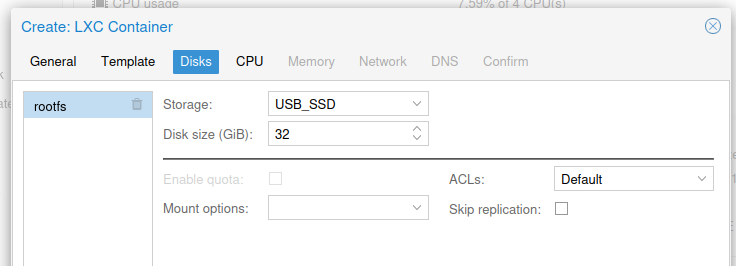
Disks Tab
Set a root disk, I have configured 32 GB.
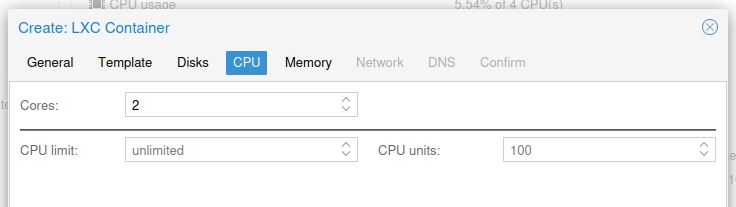
CPU Tab
Add additional cores, I have configured 2 vCPUs, for my requirements this will be plenty.
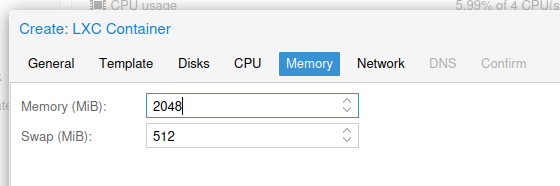
Memory Tab
I will be allocating 2 GB of RAM (2048 MB), again, for my requirements this will be plenty.
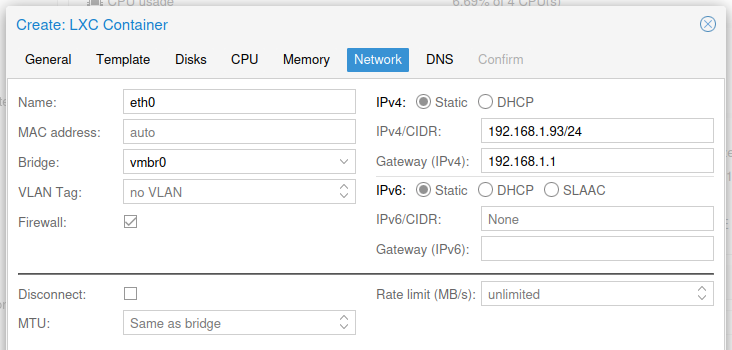
Network Tab
Its recommended to have a fixed IP address for servers, this can be achieved by setting a static address, like I have in the screenshot below or create a DHCP reservation.
DNS Tab
Finally I have left the DNS domain and server as the host values.

Complete the container creation.
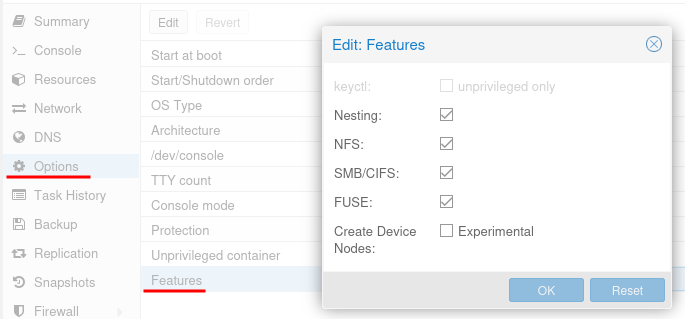
Navigate to the container Options > Features and Enable features for Nesting, NFS/CIFS and FUSE.
Now start the container and open a console to it.
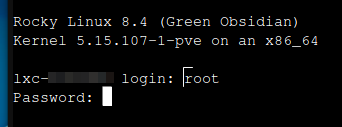
Rocky Linux
Check for package updates and upgrade them all.
I have included the commands to automatically remove no longer required packages and cleanup temporary files.
# Non-interactively checks if updates of packages are available.
dnf check-update

# Updates each package to the latest version that is both available and resolvable.
dnf upgrade -y

# Removes all "leaf" packages from the system that were originally installed as dependencies of user-installed packages, but which are no longer required by any such package.
dnf autoremove -y

# Performs cleanup of temporary files kept for repositories.
dnf clean all
SSH
I will also be installing OpenSSH for remote access
dnf install -y openssh-server
Root is not granted access by default, therefore you’ll need to edit the config file
vi /etc/ssh/sshd_config
Uncomment the line PermitRootLogin and change prohibit-password to yes.
Restart the SSHD service
systemctl restart sshd
Podman
# Search the repositories
dnf search podman

# Install
dnf install podman -y
Start the podman service
# Enable
systemctl enable --now podman
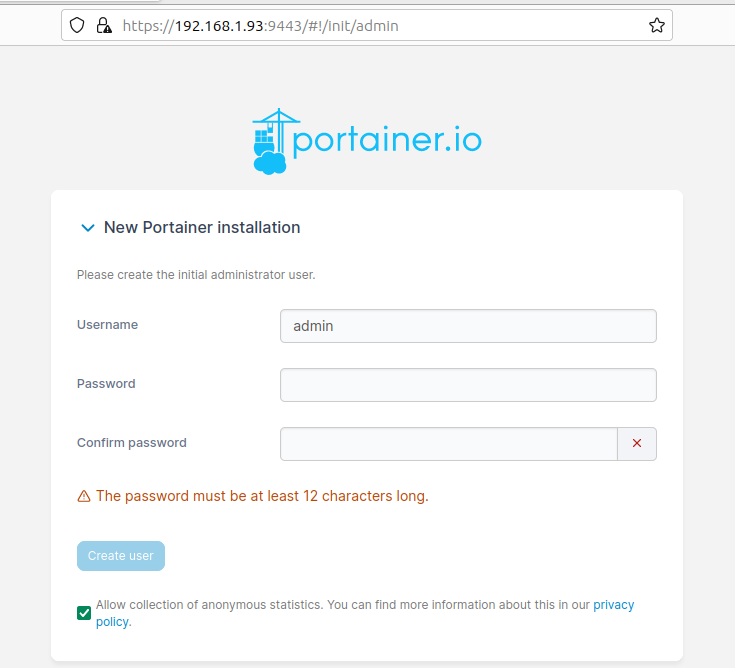
Portainer CE
Install portainer CE (Community Edition).
Create a data volume
podman volume create portainer_data

# List volumes
podman volume list
Create the container with elevated privileges
sudo podman run -d -p 9443:9443 --name portainer --restart=always -v /run/podman/podman.sock:/var/run/docker.sock:Z -v portainer_data:/data docker.io/portainer/portainer-ce:latest

# List containers
podman ps
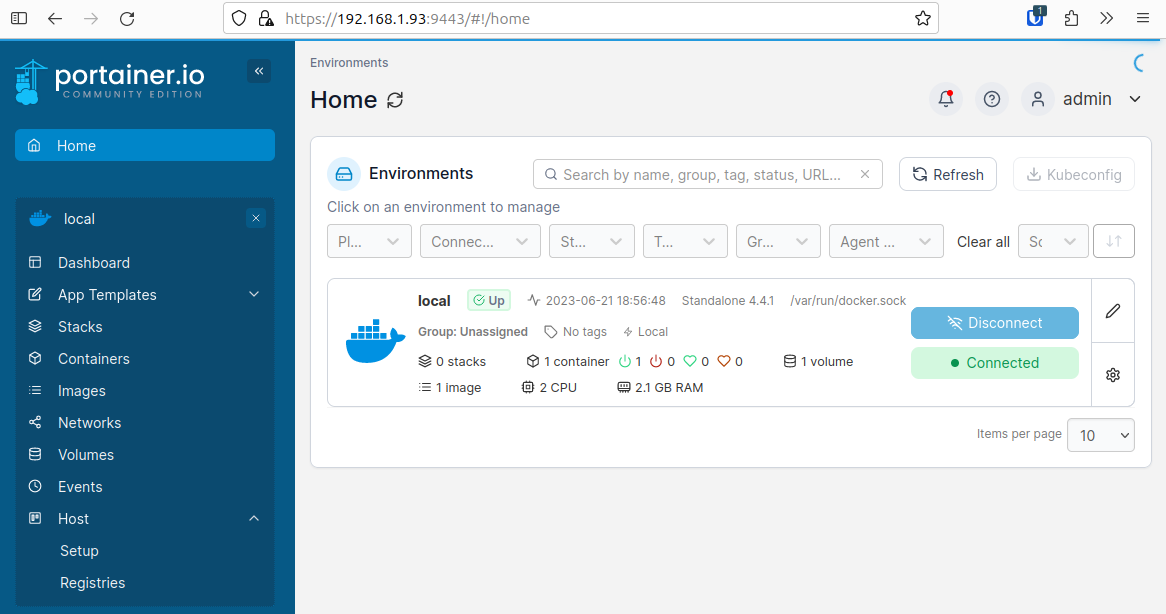
Access the Portainer web interface via the container’s IP address
https://192.168.1.93:9443/
The welcome screen provides an option to start a new installation or restore from backup.
This completes the installation and we are ready to start deploying micro-services.
Lastly you may need to install CIFS and NFS utilities if you plan of using external Volumes.
dnf install -y cifs-utils
dnf install -y nfs-utils
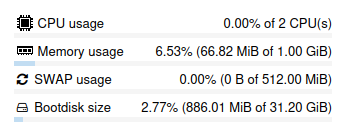
To wrap up here is a screenshot of the LXC container system resources.
In this article I have deployed a Rocky Linux 9 LXC container on Proxmox VE, then installed Podman the open source alternative to Docker. Finally I have deployed a Portainer container for ease of management of containers and stacks (compose).
Bonus
Creating a new Bridge network
The built in bridge network is considered legacy and its not recommended for production system. More information about this can be read on the Docker Docs site.
A major benefit of a user defined bridge is that containers can not only communicate by IP address, but can also resolve a container name to an IP address. This capability is called automatic service discovery.
Lets start by listing all of our networks
podman network ls
We can view the configuration of the default podman bridge network, by using the inspect command
podman network inspect podman
Below is an example of creating a user defined bridge, which provides DNS features, a specified subnet and gateway and no IPv6 configuration.
podman network create --driver bridge --subnet 172.16.10.0/24 --gateway 172.16.10.1 customBridge
To attach containers to this network we need to add a network declaration in our compose/stack and state our external network.
services:
  myservice:
    image: image:latest
    container_name: myservice
    networks:
      - customBridge
    ....

 networks:
  customBridge:
    external: true
Some additional reading: